Homemade Pond Rake (Super Easy Using Common Household Supplies)

by Tory Jon | Last Updated: June 23, 2022
Pond Academy is reader-supported. Buying through links on our site may earn us an affiliate commission. As an Amazon Associate I earn from qualifying purchases.
Removing weeds, muck, algae, and debris from your backyard pond can be difficult.
However, that job becomes much easier with a pond rake.
In fact, they have so many uses that we classify them as one of the few must-have tools for pond owners.
So, let's look at how we can build a homemade pond rake for about half the cost ($65 total at the time of writing this) of a prebuilt one ($130 for the Razer Rake).
But let's first look at what a pond rake is and everything it can do.
What Is A Pond Rake?
Pond rakes are basically landscape rakes with a removable float attached. Commonly referred to as a pond weed rake, pond algae rake, or a pond leaf rake, this pond cleaning tool is perfect for any sized pond or lake.
Many of them, including our homemade version below, have a rope attached to them, as well. This helps for ponds where you can’t reach the middle when using the rake handle alone. The rope allows you to throw the rake to the center of the pond and pull it back to you with the rope.
As mentioned above, they are great for removing pond weeds, scum, algae, some aquatic plants, and debris (like leaves, etc.) from ponds and water gardens. They can also be used for landscape grading, dressing beach sand, and removing bottom debris from your pond.
![]() Tip
Tip
While pond rakes are great for removing surface vegetation, algae, and debris, you can remove the float and use it for debris on the bottom of your pond. Just be careful if you have a pond liner not to puncture or damage it. In this instance, I recommend using it with the tines pointed up or simply using a net instead.
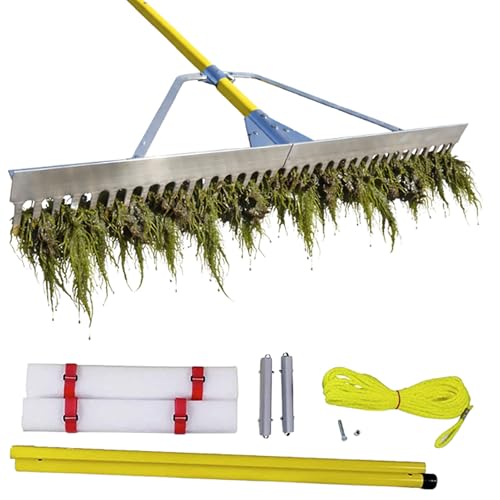
Here’s our recommended pre-built pond rake.
If you’re feeling crafty and want to make your own handheld pond rake, see our DIY pond rake tutorial below.
Get Our Best Pond Tips Sent to Your Inbox for Free!
Join thousands of others and learn from our decades of pond building and maintenance experience! Your pond will thank you!
By subscribing you agree to receive emails from PondAcademy.com. We will always respect your privacy and you can unsubscribe at any time.
DIY Pond Rake Tutorial
Pond rakes typically aren’t a cheap item to purchase, so we want to show you how to make a homemade pond rake for about half the cost of buying a premade one…
And we will use some common items you might have lying around the house.
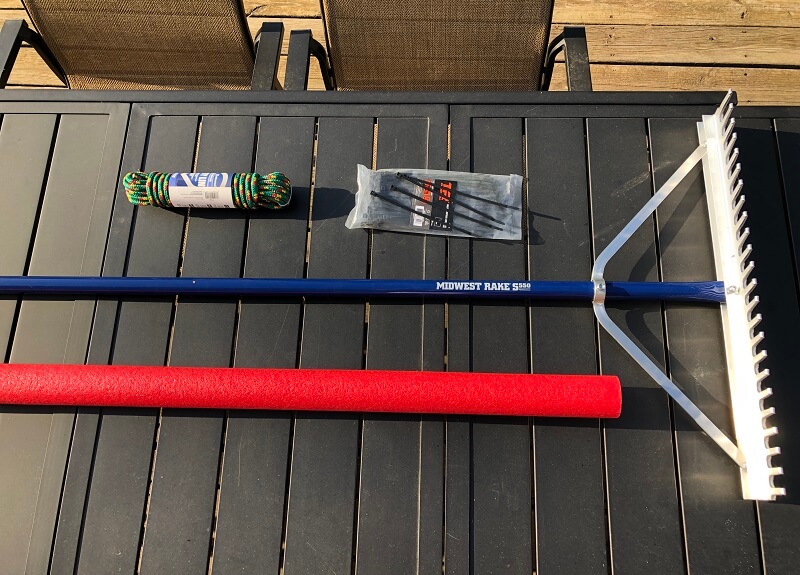
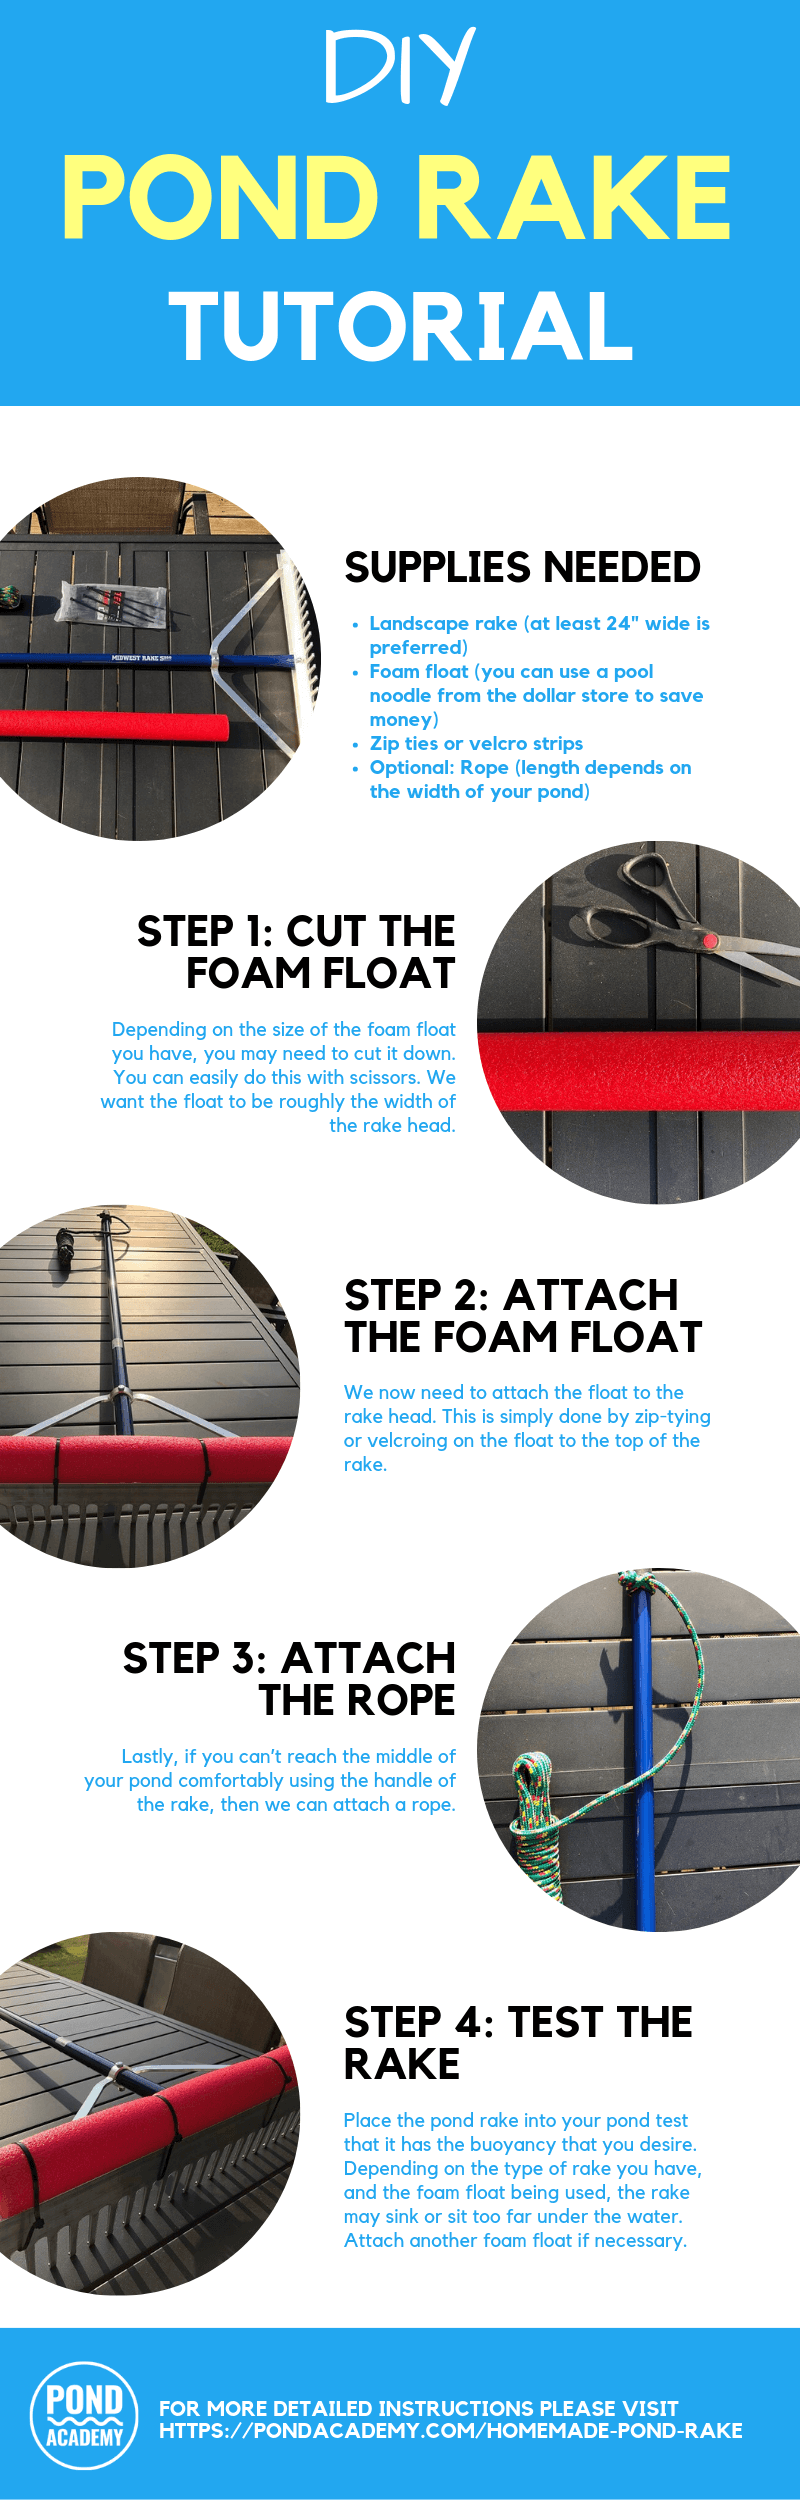
Supplies
- Landscape rake (at least 24” wide is preferred)

- Foam float (you can use a pool noodle from the dollar store to save money)

- Zip ties or velcro strips

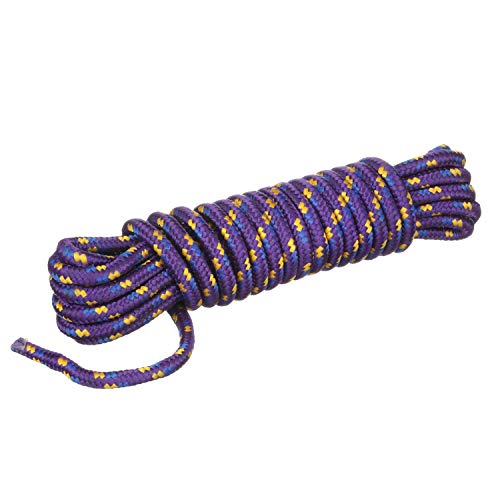
- Optional: Rope (length depends on the width of your pond)
Here's a look at all of the needed supplies. Once you have them, proceed to step 1.
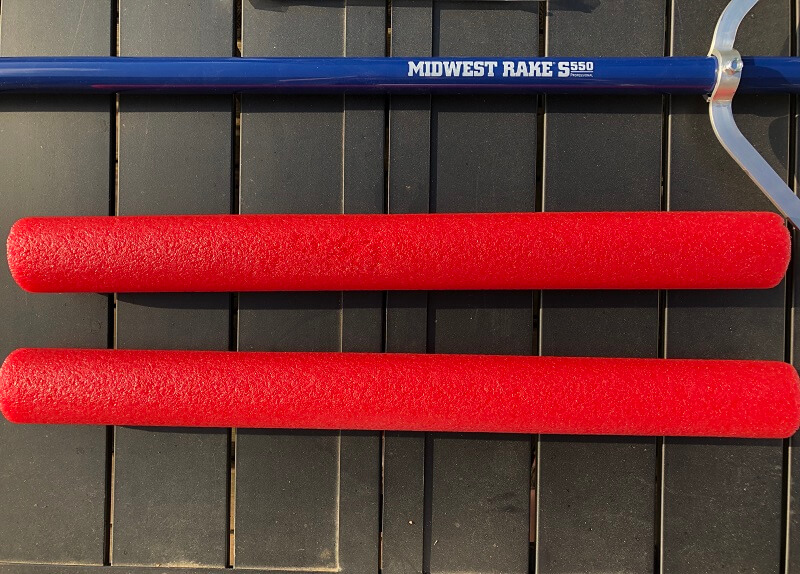
Step 1: Cut The Foam Float
Depending on the size of the foam float you have, you may need to cut it down. You can easily do this with scissors. We want the float to be roughly the width of the rake head.
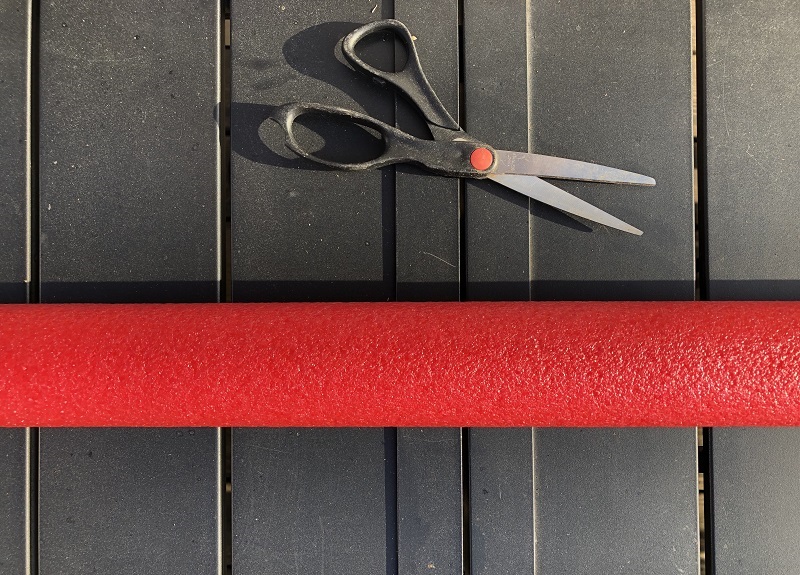
I bought a float twice the size of the rake head and cut it in half. This way, if one float doesn’t provide the desired buoyancy of the rake head, I can always add on the other half of the float.
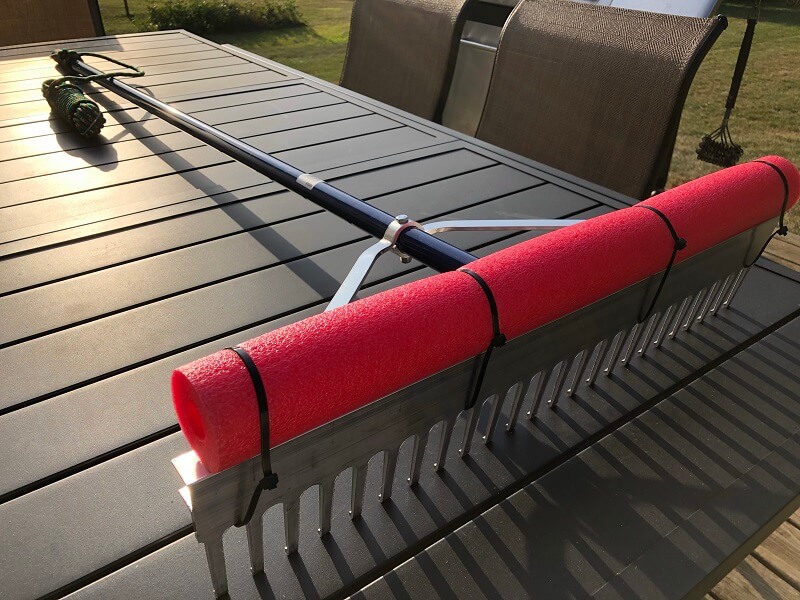
Step 2: Attach The Foam Float
We now need to attach the float to the rake head. This is simply done by zip-tying or velcroing the float to the top of the rake.
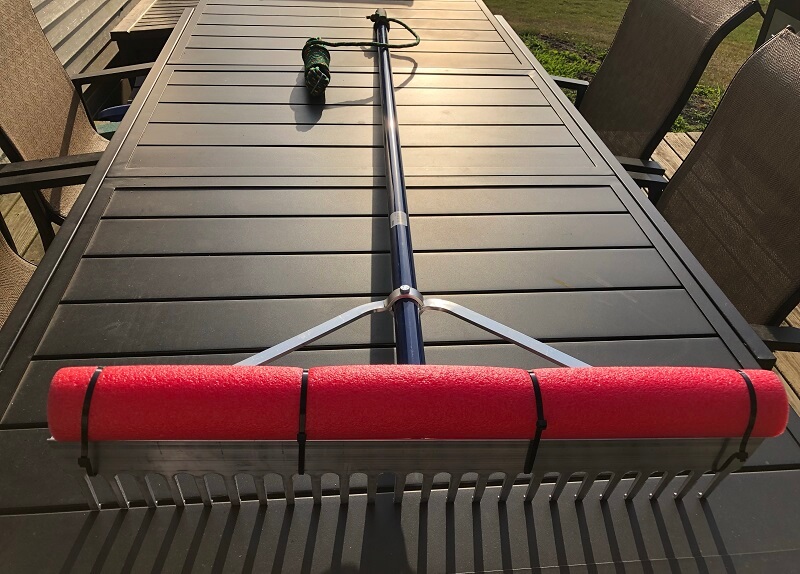
Velcro has the advantage of easily being able to remove the float when needed. For example, if you want to target debris on the bottom of your pond.
If you don’t plan on removing the float, then zip-tying will provide a more durable connection between the float and rake head.
Step 3: Attach The Rope
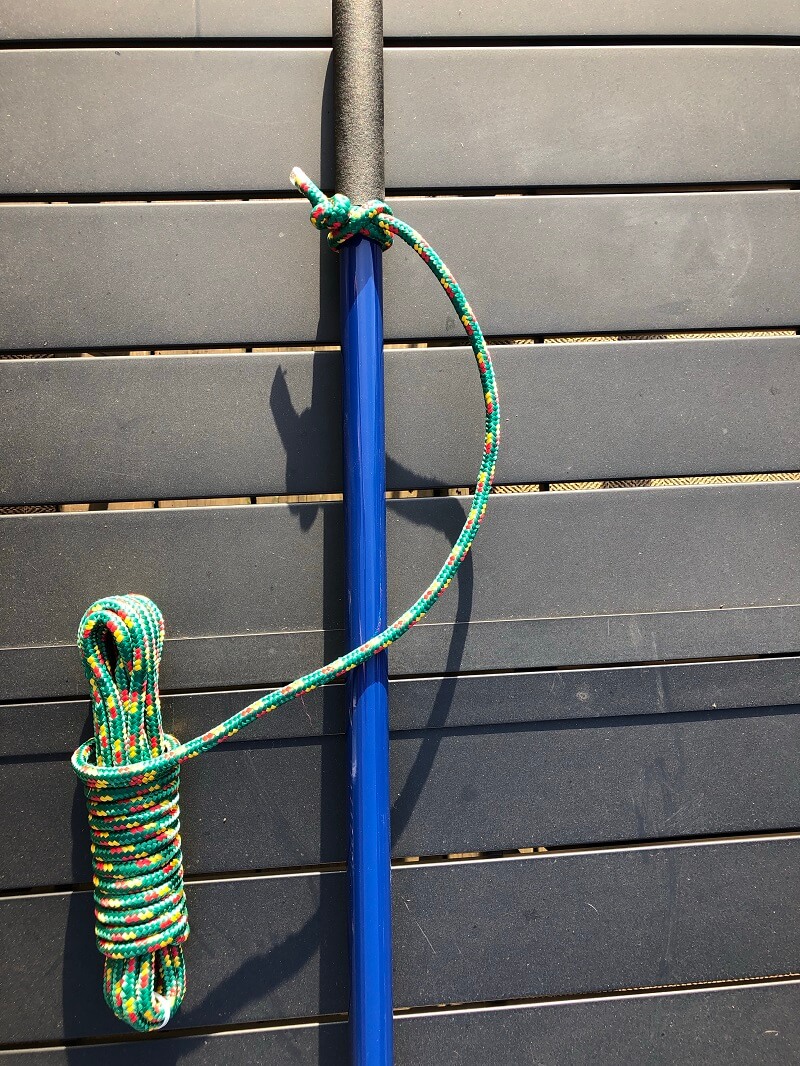
Lastly, we can attach a rope if you can’t reach the middle of your pond comfortably using the rake handle.
Some rakes will have a hole through the end of the handle (typically used to hang up the rake on a wall when not in use) that you can tie the rope through. If your rake doesn’t have a hole in the handle, you can easily attach the rope to the rake using a clove hitch knot. Here's a quick video on how to make this type of knot.
Step 4: Test The Rake
Place the pond rake into your pond to test that it has the buoyancy that you desire. Depending on the type of rake and the foam float used, the rake may sink or sit too far under the water.
This is personal preference, and the answer may even depend on the type of weeds you have in your pond. If your pond suffers from submerged weeds, you might want the rake to dip just under the water's surface. If you're trying to remove surface muck and algae, you might want the rake head to sit higher in the water. This is where having the extra foam float comes in handy. You can easily attach the second float if you need more buoyancy.
![]() Tip
Tip
When removing muck from the surface of your lake or pond's water, it can be helpful to place the rake upside down (placing the top of the rake with the foam float downwards into the water and the tines pointing up). Depending on the buoyancy of the float, this often will allow the rake tines to scrape the surface of the water much more effectively.
And that’s it! In less than 5 minutes, you can have a simple yet effective homemade pond rake for less than a prebuilt one.
Pond rakes are a great tool to help you clean your pond without draining it… and so much more.
And again, if you would rather use a pre-built rake or just want more options, check out this floating pond rake that features a 102” handle, 36” rake head, and a 25’ rope!
Homemade Pond Rake Infographic Tutorial
For all you Pinterest users and just general infographic lovers, here's a step-by-step (simplified) tutorial in a shareable image form. Enjoy!


